Introduction to Drawing a Strawberry Cheesecake
When it comes to food art, desserts like strawberry cheesecake are particularly popular due to their rich textures and vibrant colors. Drawing a strawberry cheesecake allows you to explore different art techniques and helps in improving your shading, perspective, and attention to detail.
Materials You Will Need to Draw a Strawberry Cheesecake
Before we start, gather the necessary materials to ensure the best results:
- Pencils (various grades for sketching and shading)
- Erasers (kneaded and standard)
- Paper (high-quality drawing paper)
- Colored pencils or markers (for adding color)
- Reference images of strawberry cheesecakes (you can find these on platforms like Pinterest or stock image sites)
Understanding the Structure of a Strawberry Cheesecake for Drawing
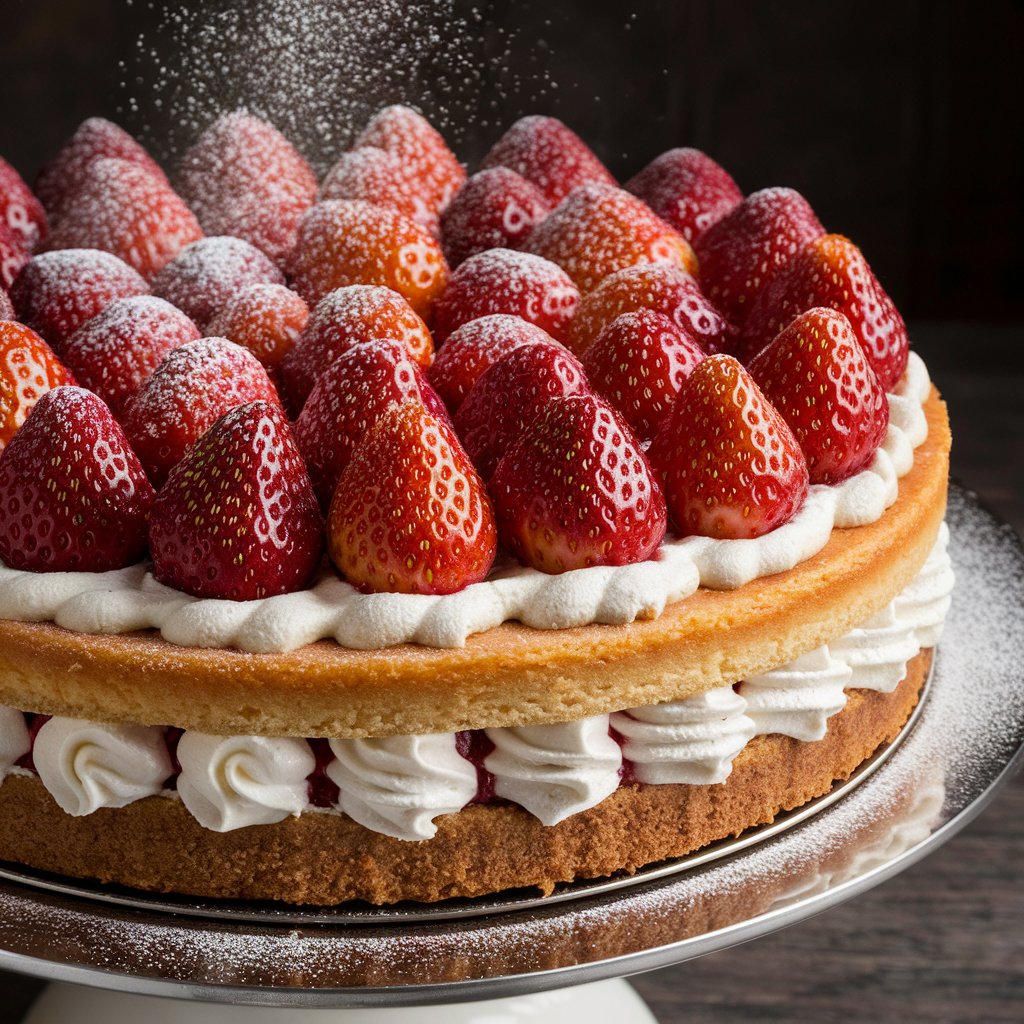
To draw a realistic cheesecake, it’s crucial to understand its structure. A strawberry cheesecake typically consists of three main layers:
- The crust: This is usually made from crushed graham crackers or biscuits, giving it a rough texture.
- The filling: The cheesecake filling is smooth and creamy, often with a slight sheen.
- The topping: Fresh or glazed strawberries are commonly used, providing a contrast in texture and color.
Understanding these elements will help you draw each part with the appropriate texture and detail.
Step-by-Step Guide: Drawing the Cheesecake Base

1. Start with the Basic Shapes of the Strawberry Cheesecake
- Begin by lightly sketching the basic shape of the cheesecake. Use a rectangle or trapezoid for the base and a rounded top for the filling. Ensure the proportions are accurate, and keep the lines light to make adjustments easier.
2. Define the Layers in Your Strawberry Cheesecake Drawing
- Add lines to separate the crust, filling, and topping. This step will help you visualize the different sections and ensure that each part of the cheesecake is correctly proportioned.
3. Refine the Shape of the Cheesecake Drawing
- Refine the edges of the cheesecake, making the corners slightly rounded. Add details to the crust, such as uneven edges or crumbs.
Adding Details: Drawing the Strawberry Topping on Your Cheesecake
1. Draw the Strawberries on Your Cheesecake Drawing
- Start by drawing the outline of each strawberry. Vary their sizes and positions to create a natural look. Strawberries are generally heart-shaped with a pointed end.
2. Add Texture to the Strawberries in Your Drawing
- Use short, curved lines to create the seeds on the strawberries. Focus on making the strawberries look plump and juicy by adding subtle shading.
3. Incorporate the Glaze on Your Strawberry Cheesecake Drawing
- If your cheesecake has a glazed topping, add a layer of
glaze over the strawberries. Use smooth, wavy lines to represent the glossy finish of the glaze. Highlight the areas where light would naturally reflect off the glaze.

For more tips on creating realistic food art, explore Tips for Realistic Food Art.
Final Touches: Coloring and Shading
1. Color the Crust
- Use a light brown or beige color to fill in the crust. Apply more pressure to darken certain areas, such as the edges, to create depth.
2. Shade the Filling
- For the filling, choose a soft, creamy color like ivory or pale yellow. Focus on the lighting in your drawing—add shadows where the filling meets the crust and around the edges.
3. Bring the Strawberries to Life
- Color the strawberries with vibrant reds, adding darker reds or purples for shadows. Use white or a light pink pencil to add highlights, giving the strawberries a shiny appearance.
4. Final Shading and Highlights
- Go over the entire drawing, adding shadows and highlights to enhance the realism. Pay special attention to areas where light would naturally hit, such as the top of the strawberries and the glaze.
Enhancing the Drawing with Background Elements
Adding a simple background can make your strawberry cheesecake drawing stand out. Consider including elements like:
- A plate beneath the cheesecake.
- A fork or knife beside it.
- A lightly textured table surface.
These elements can add context and make your drawing more engaging. For instance, drawing textures similar to those found in a Pumpkin Banana Loaf can provide practice and inspiration for adding depth and realism to your cheesecake illustration.
Digital Drawing Techniques (Optional)
If you prefer digital art, you can recreate this strawberry cheesecake using software like Procreate or Photoshop. The main difference between traditional and digital art is the tools you’ll use, but the techniques remain largely the same. Digital art allows for more flexibility, such as the ability to easily adjust colors and add layers.
For beginners interested in digital art, check out Procreate Basics for Beginners.
Common Challenges and How to Overcome Them
1. Proportion Errors
- If your cheesecake looks distorted, check the proportions of each layer and the strawberries. Use a reference image to correct any mistakes.
2. Unrealistic Shading
- Ensure your light source is consistent throughout the drawing. Incorrect shading can make the cheesecake appear flat.
3. Overworking the Drawing
- It’s easy to overwork a drawing, especially with shading. Take breaks and revisit your work with fresh eyes to avoid this.
Showcasing Your Art: Tips for Sharing on Social Media
Once you’ve finished your drawing, you’ll want to share it with the world. Here are a few tips:
- Photographing your work: Ensure good lighting and use a neutral background to make your artwork stand out.
- Editing your image: Slight adjustments to brightness and contrast can make your drawing pop.
- Engaging with the community: Share your artwork on platforms like Instagram, Pinterest, or Reddit. Use relevant hashtags like #foodart or #dessertdrawing to reach a larger audience.
Conclusion and Encouragement
Drawing a strawberry cheesecake is not just about creating a beautiful piece of art; it’s about practicing and improving your drawing skills. Each layer of the cheesecake offers a different challenge, from getting the proportions right to perfecting the shading and texture. Keep practicing, and don’t be afraid to experiment with new techniques. Share your finished work with others, and most importantly, enjoy the process!
FAQ Section
How long does it take to draw a strawberry cheesecake?
The time it takes can vary depending on your skill level and the amount of detail you want to include. On average, it might take 2-4 hours.
What are the best tools for drawing food art?
For traditional art, quality pencils, colored pencils, and smooth paper are essential. For digital art, a good drawing tablet and software like Procreate are recommended.
Can beginners draw realistic strawberry cheesecake?
Absolutely! Start with basic shapes and gradually add details. This guide provides step-by-step instructions that are suitable for beginners.
How do I improve my shading technique for drawing desserts?
Practice is key. Focus on understanding light sources and how they affect the shape and texture of objects. Experiment with different shading techniques, such as cross-hatching or blending.


